顯示具有 GPIO 標籤的文章。 顯示所有文章

2016年2月3日 星期三

nRF51x22 Simple KeyScan

1. Test Schematic: (KEY1 = GPIO25)


2. Button.c
--------------------------------------------------------------------------------------------------------------------

#include "Button.h"

uint16_t  DebounceKeyCnt = 0;
uint8_t   KeyValue = 0; 
uint8_t   KeyState = 0;

void Button_Init(void)
{
 nrf_gpio_pin_dir_set(Button_GPIO_Pin,NRF_GPIO_PIN_DIR_INPUT);   //configurate pin direction to input
 nrf_gpio_cfg_input(Button_GPIO_Pin, NRF_GPIO_PIN_PULLUP); //pull-up
}

uint8_t KeyScan(void)
{
 KeyValue = nrf_gpio_pin_read(Button_GPIO_Pin);
 
 #ifdef high_active
  KeyValue = KeyValue;    //active high
 #endif
 
 #ifdef low_active
  KeyValue = !(KeyValue); //active low
 #endif
  
 if(KeyValue >= 1)
 {
  DebounceKeyCnt++;
 
                if(DebounceKeyCnt >= 5)
                {
   DebounceKeyCnt = 0;  
   KeyState = 1;
                }    
 }
 else
 {
  DebounceKeyCnt = 0;
  KeyState = 0;   
 } 
        
 return(KeyState);
}


3. Button.h
---------------------------------------------------------------------------------------------------------------------


#include "nrf_drv_gpiote.h"

#define Button_GPIO_Pin 25

#if 0
 #define high_active
#else
 #define low_active
#endif

void Button_Init(void);
uint8_t KeyScan(void);


2015年12月12日 星期六

STM32F4xx Software I2C Slave Test Code

1. 既然有使用GPIO模擬的I2C Master, 當然也會有使用GPIO模擬的I2C Slave, 本範例是使用2塊
    STM32F401 Discovery Board模擬I2C Master/Slave來互相傳收資料, 由於預設的I2C GPIO是
    PB6和PB9, 因此我們必須將2塊Discovery Board的PB6/PB9互接.


2. Master Main Flow:

  • I2C GPIO Init.
  • write one byte(0xEF) to slave.
  • write six bytes(0x12,0x34,0x56,0x78,0xAB,0xCD) to slave.
  • read one byte(0x55) from slave.
  • read six bytes(0x11,0x22,0x33,0x44,0x55,0x66) from slave.     

3. Slave Main Flow:
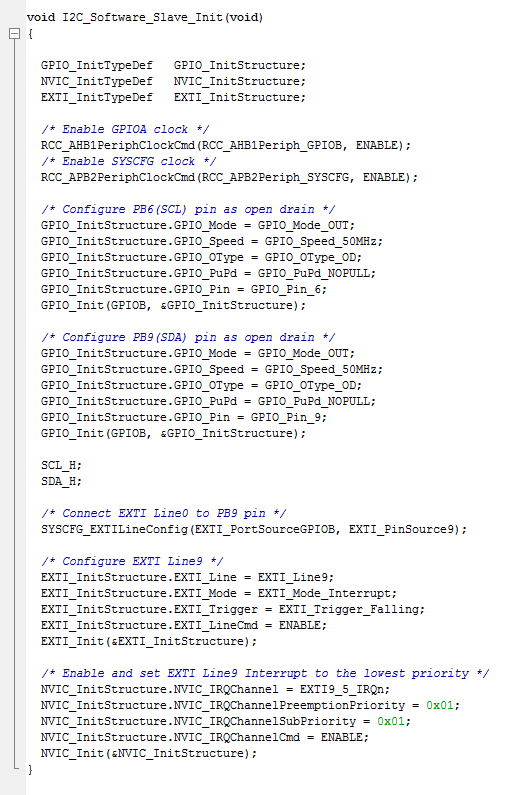
  • 除了設定I2C GPIO外, 還需要利用Start Condition一個特性, SDA會由High to Low, 因此我們可以在SDA GPIO設定一個Falling edge Interrupt來偵測何時發生I2C傳輸.
  • slave discovery board address = 0x72.

  • 由於我們是使用SDA(PB9)來偵測Falling edge Interrupt, 所以我們必須使用STM32的EXTI9_5_IRQn來進行傳輸.

4. Test Flow:(Logic analyzer)
  • write one byte to slave:

  • write six bytes to slave:
  • read one byte from slave:
  • read six bytes from slave:

5. Test Code Download Link:

     Master

     Slave

2015年12月11日 星期五

STM32F4xx Software I2C Master Test Code

1. I2C是目前相當多人使用的通訊介面, 但由於每個MCU的I2C設定皆不相同, 因此當要使用時,
   皆需要許多時間來先研讀之後, 才能可以使用.

2. 因此若能使用一般的GPIO來模擬I2C SCL SDA的話, 那麼未來在各個MCU之間跨平台使用
    皆相當地方便, 因為只要簡單的設定GPIO High及Low之後, 即可馬上使用I2C介面來進行傳
    輸.
   

3. Test Platform:
    STM32F401 Discovery Board, 從電路圖上看起來他預設的I2C GPIO是PB6(SCL)和PB9(SDA),
    且在I2C Bus上有掛載一顆LSM303DLHC Sensor.

4. Main Flow:

  • I2C Software GPIO Init.
  • Systick Init(Delay).
  • Read LSM303DLHC ChipID(0x0F).
  • Write Enable Command to LSM303DLHC.


5. Logic analyzer Signal:

  • Read LSM303DLHC ChipID

  • Write AXES ENABLE TO LSM303DLHC


6. Example Code Download Link:
 
    STM32F4x1_Discovery_Software_I2C_Master_Test_Code